教你用Hexo创建个人博客
准备工作
安装Node.js 12以上版本
安装hexo
1 | |
创建博客工程
1 | |
安裝hexo发布插件
在博客工程目录执行以下命令
1 | |
安装主题
在博客工程目录执行以下命令
1 | |
然后在博客目录下创建_config.fluid.yml,将 _config.yml 内容复制进去。
命令说明
清理生成的页面
1 | |
开启本地服务器
调试页面时, 不用生成页面. 直接启动本地服务器即可
如果修改了配置文件, 重新开启本地服务器即可
1 | |
生成页面
1 | |
发布到github (一键部署)
执行部署之前, 先需要生成页面
修改配置文件_config.yml
1 | |
执行命令
1 | |
主题设置
修改首页banner图片
建议用
1920*1080分辨率的图片. 图片大小最好不要超过1MB
在source/img文件夹中加入banner图片

到_config.fluid.yml配置中修改banner图片路径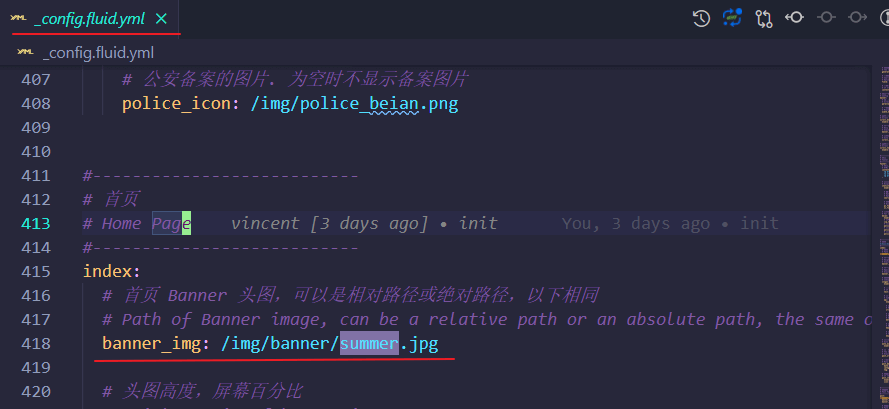
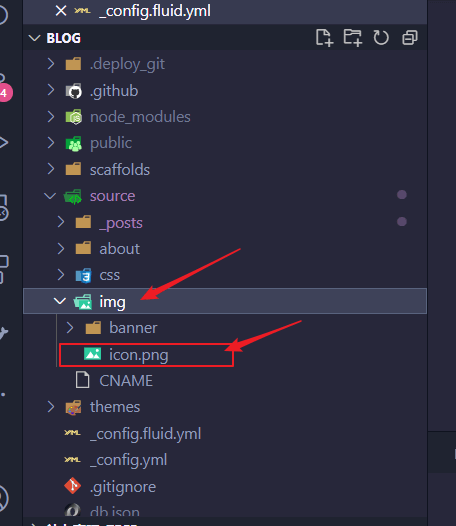
修改网站ICON图标
在icon网站下载
彩色图标png文件
例如: https://www.iconfont.cn/把icon文件放入/source/img文件夹.
在
_config.fluid文件, 修改icon文件路径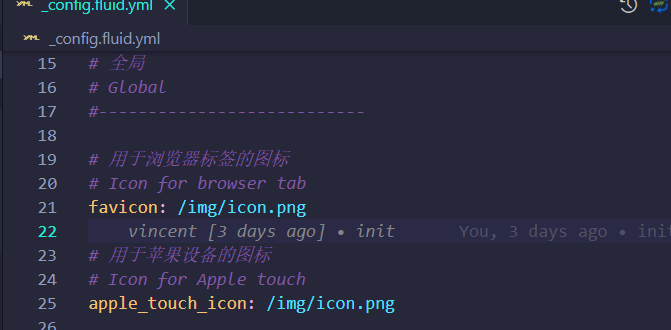
写作说明
文章添加封面图片
在文章的最上面设置以下信息
1 | |
github设置
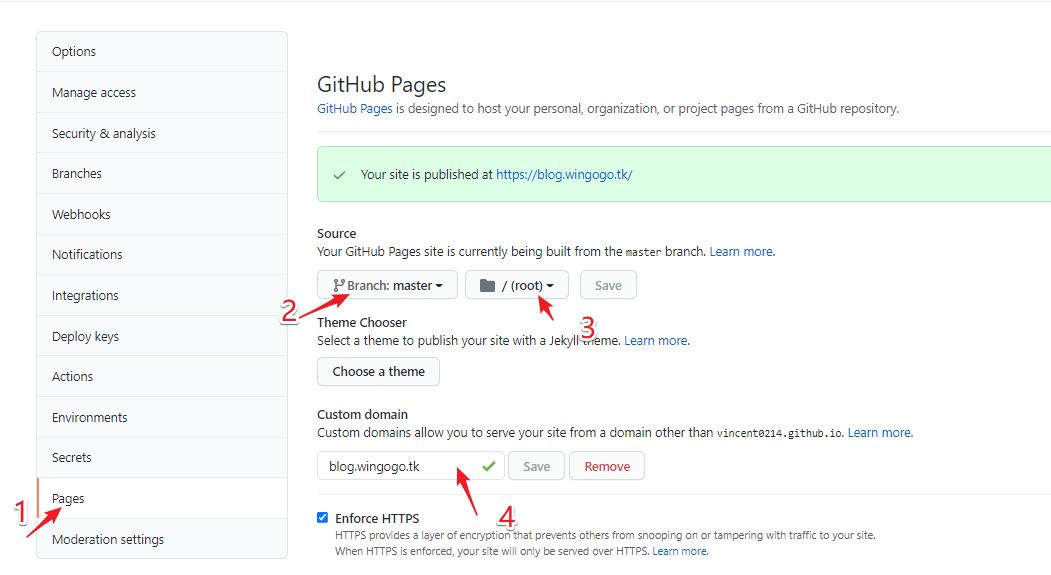
blog.wingogo.tk是本案例的博客域名, 图中4号位置填上你的博客域名
配置域名
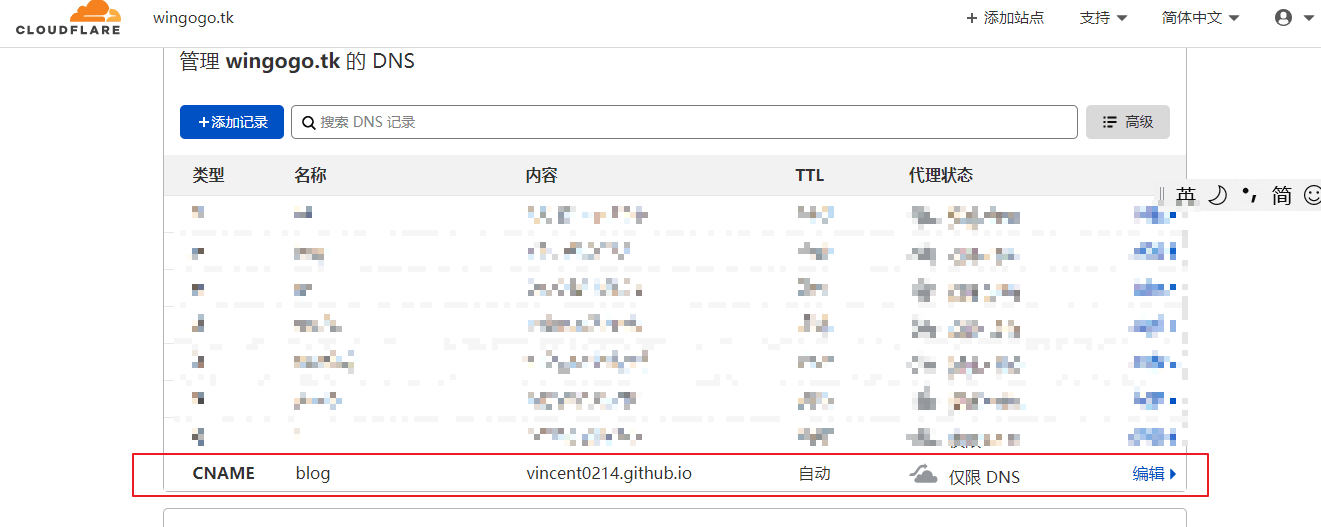
DNS设置CNAME记录值为github page的url
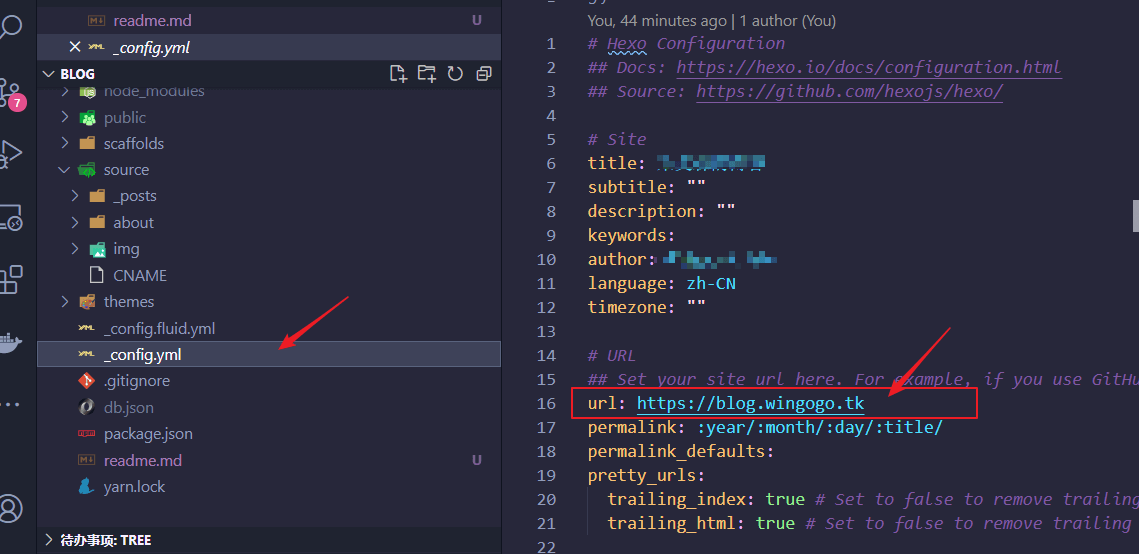
在source文件夹添加文件CNAME, 在CNAME文件中填上你的博客域名

To set up a www or custom subdomain, such as www.example.com or blog.example.com, you must add your domain in the repository settings, which will create a CNAME file in your site’s repository. After that, configure a CNAME record with your DNS provider.
设置url为域名
参考:
- hexo官网: https://hexo.io/
- fluid主题: https://github.com/fluid-dev/hexo-theme-fluid
教你用Hexo创建个人博客
https://blog.9001001.xyz/posts/6ad9f01285a1/